Welcome to TheOhioOutdoors
Wanting to join the rest of our members? Login or sign up today!
Login / Join

Trying something new for a coyote howler

Creamer

Active Member
1,589
81
Athens
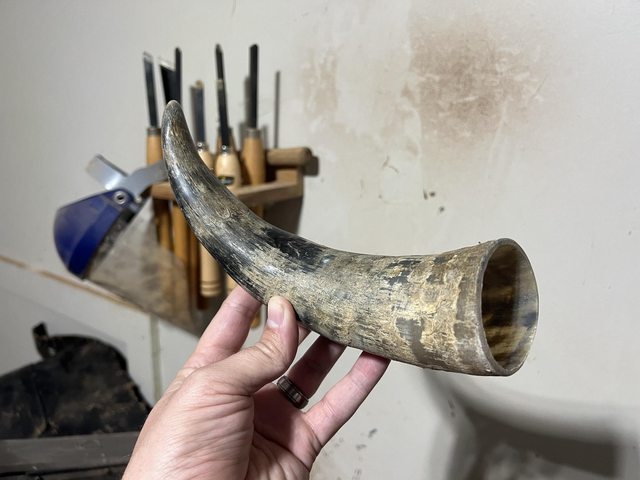
I've been wanting to try a horn howler for a few months. I follow some call makers on social media that produce some beauties. My expectations were set much lower, trying something brand new. Here's what I started with.


I knew when I pulled the first horn out (I ordered a couple, expecting to ruin one or two) this was going to be a LOT of work. The trickiest part, to me, was where to cut the tip off to get started. I picked a spot thinking it was about the right diameter portion to cut and went at it with a hacksaw. It was solid horn, no hole at all when I cut that tip off. So I drilled a small hole to get a sense of how far I had to go. Luckily, it wasn't far, and I drilled a larger bore hole to accept a tenon of the reed/tone board "receiver." Basically a plug to accept the reed assembly. The lower end had a lot of damage on the horn so I cut that off to set the length of the horn body of the call. After a LOT of sanding and elbow grease, I was getting closer to what I was after.


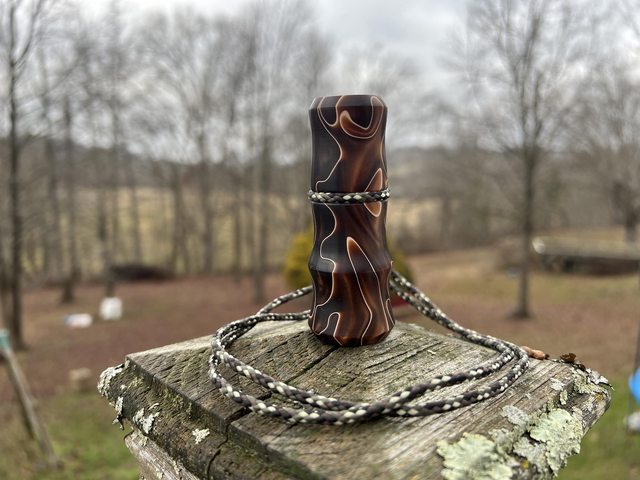
Hard to see here, but basically the end of the call wasn't nearly as round as the receiver plug I turned out of "coal mine" (black) acrylic. I used a fine tip sharpie to outline the edge of the receiver so I knew where to sand to get the narrow end of the horn closer to round. Thank God for belt sanders. It made quick work of the job, then I hand sanded down to 800 grit by hand.


Now I'm getting really close.


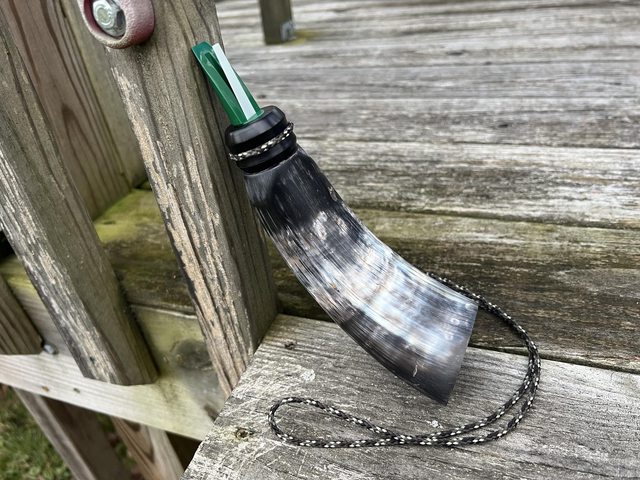
This is sanded down to 800 on the horn and receiver. I wiped down the horn with a wet cloth to show the true color of the horn. Holding everything together, I ripped a few howls through it. It's got some serious volume, sounds pretty good.


At this point, I'm at a stand-still while I wait on some polishing compound I ordered to finish off the horn. I think it's coming next Monday. So far, I'm really happy with attempt #1. #2 will probably get started soon.
 

Creamer

Active Member
1,589
81
Athens
I ended up turning a different acrylic receiver for that first horn. It looks the same, but it's a 5/8" diameter bore instead of 1/2" to accept a bigger reed assembly. I wanted to stick a Primos Lil Dog reed in this thing and it takes the 5/8" hole. My polishing compound came yesterday, early, so I got on finishing that first call last night. I hand sanded to 800 grit, then did the polishing compound from 5 micron down to 1 micron, which I think it something close to like 10,000 grit. Before buffing off the last coating of polishing compound:


Done.


It ain't perfect but I'm pretty pleased with attempt #1. I wanted a good sounding, loud, functional call. I got that. I ripped a few howls on it this morning and it sounds great. Now to live animal test.
 

Wildlife

Denny
Supporting Member
5,247
191
Ross County, Ohio
Really nice work!

I'd be interested in hearing how it sounds, which I bet, it sounds darn good. Throw a video clip in here and lets hear it, if you've got the time.

My FIL works with animal bullhorns for muzzleloader powder carriers for those old school types that care to include one with their gear for either flintlock rifles, muzzleloaders &/or black powder pistols. He still has some I do believe and I offered to sell them for him at one of the stroud (deercamp) fall events. I don't think anybody took me up on any, but they're still available I do think if anyone is interested. If so, I'll make the call.

Again, real nice work! Have fun with it!!
 
Last edited:
  • Like
Reactions: Creamer

Creamer

Active Member
1,589
81
Athens
I made another one. The process went smoother but the horn was in a lot rougher shape. I knew I liked the color before I even started it, but there were a LOT of defects to try to get out.


It was pretty clear pretty fast that I wasn't going to be able to get them all out. The walls of the horn were relatively thin and I didn't think I could sand deep enough to get the dings out without possibly ruining the horn making it too thin and brittle. I did the best I could sanding it, and turned an English walnut reed receiver for it.


Once I get the receiver done, I know where I need to grind down the narrow end of the horn to somewhat match that shape/diameter. As you can see, a lot of excess horn had to go.


Once it was sanded down to shape through 1000 grit, I worked through the polishing paste from 5 micron down to .5 micron.


I used an old Woods Wise howler reed assembly in this one that sounds a lot raspier and like an older dog. Turned out pretty good, given the blemishes I couldn't get sanded out.


Last edited:

Creamer

Active Member
1,589
81
Athens
Acrylic calls can look cool, but I freakin hate working with this stuff.


This is a jackrabbit distress call, very loud and sounds good. I'd like to take more material out and give the call a little more character, but the stuff is so fickle to work with I'm scared to ruin what I have. It chips and flakes really bad if you get the least bit aggressive. Places I wanted to remove material, I had to start pushing a little harder to get material out and that's when bad shit happens. I called it where I was to be safe. The good things about acrylic: impervious to weather, simple to finish, ultra-durable, and very loud. The negative: I hate working with it.
 

Creamer

Active Member
1,589
81
Athens
I did some research on acrylic turning last night and it seems like I'm using the wrong style of bit in my carbide tools. What I'm using has a flat top surface, which is more aggressive, and doesn't do as well on acrylic or other dense material. A negative rake cutter that's beveled on the top is supposed to get much better results. That's only an $18 swap so it's worth it to me to try since I have some acrylic left I'd like to make use of. I'll be near a Woodcraft this weekend and they sell them, so I'll try to get my hands on one.
 
  • Like
Reactions: Mike and "J"

"J"

Git Off My Lawn
Supporting Member
57,050
274
North Carolina
I did some research on acrylic turning last night and it seems like I'm using the wrong style of bit in my carbide tools. What I'm using has a flat top surface, which is more aggressive, and doesn't do as well on acrylic or other dense material. A negative rake cutter that's beveled on the top is supposed to get much better results. That's only an $18 swap so it's worth it to me to try since I have some acrylic left I'd like to make use of. I'll be near a Woodcraft this weekend and they sell them, so I'll try to get my hands on one.
Nice! Was wondering if that was the reason or if the RPM could of been the issue as well. Hopefully that’s the ticket, Jeff. 👍🏼
 
  • Like
Reactions: Creamer

Creamer

Active Member
1,589
81
Athens
I stopped in at Woodcraft and they did have a negative rake round "finisher" carbide bit to fit my lathe tools. I'm shocked but it did make a huge difference. It's still slow going because the stuff is so dense and hard, but the test piece I worked yesterday didn't chip or flake at all with the negative rake head. I'll end up ordering another one to fit my square "rougher" and only use those bits on acrylic to save them.

The other thing Woodcraft had was some laminate turning stock, and I love that stuff. This is "applejack." I fittingly put a jackrabbit distress reed in it.